FAQ
Basic Installation Guide
Secondary Wan Configuration in Nebero?
To add 2nd ISP to nebero, You must have two things :
1. Admin Access to Nebero Console.
2. ISP details that include WAN IP , Subnet Mask , Gateway , Primary DNS , Secondary DNS provided by your internet provider.
You can find netconfig option under nebero config. Click on netconfig option. You will find a scrren like this :
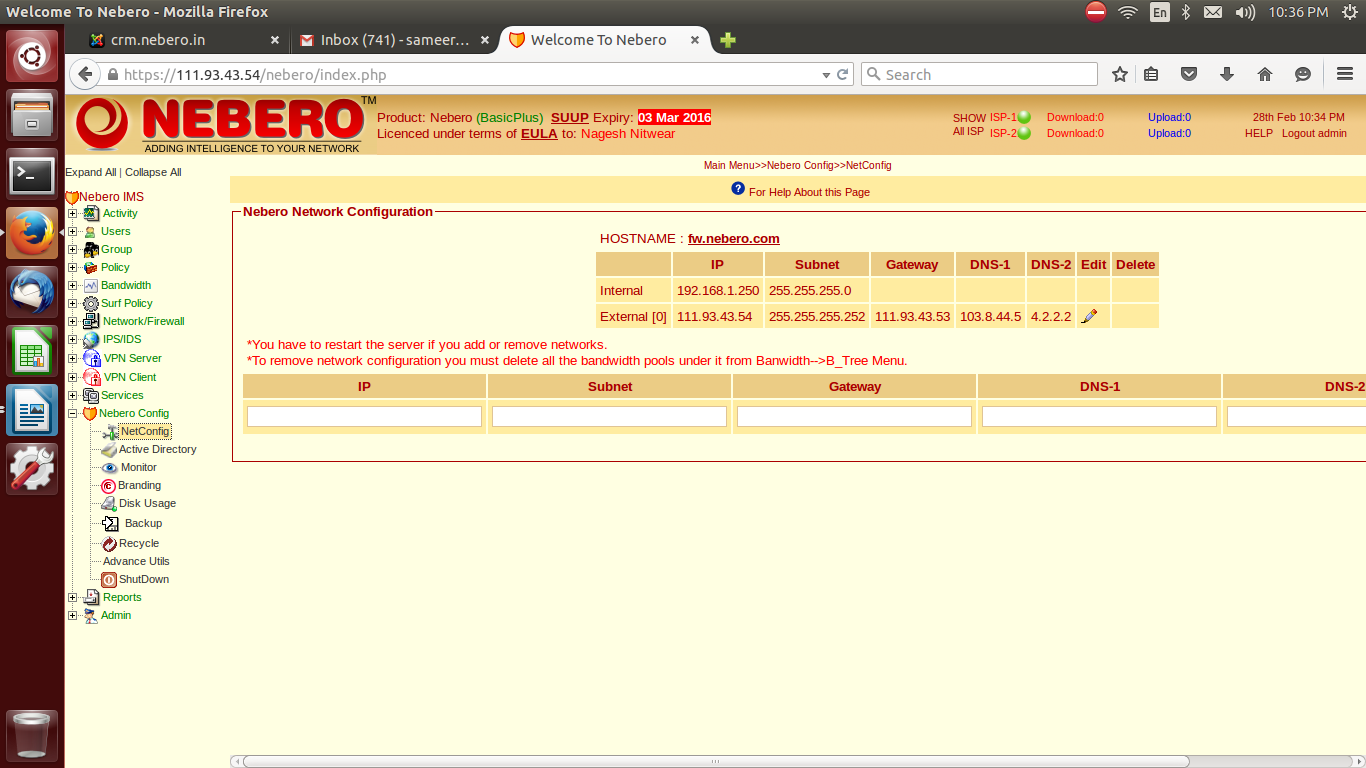
To add 2nd ISP you have to fill the IP details that has been provided by the internet service provider (ISP) very carefully and Add it. After saving the IPs it will take one or two minutes to save the network configuration. Let the settings save without doing anything.
After the settings has been updated we have to restart the server. And physically connect the ISP internet cable to the switch where first ISP has been already connected. When the server will come up after the reboot we can check it by looking at the green dot on the top right of the nebero console. If its coming green ISP has been added successfully.
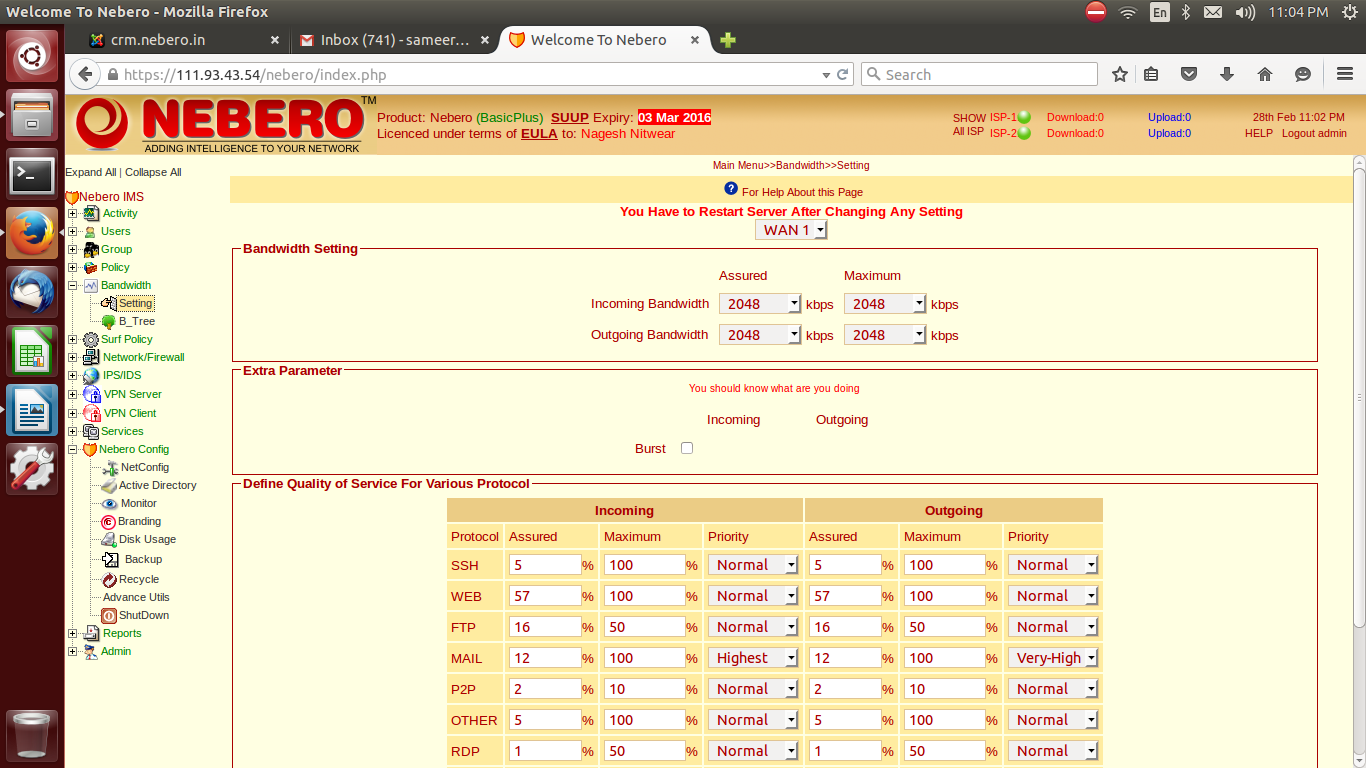
Step after adding 2nd ISP to nebero is that we have to do the bandwidth seetings for that particular ISP line in Bandwidth option. Look into the picture :
Here we will click on Setting option. And select “WAN 2”.
If you have 2MBPS line please give assured and maximum incoming bandwidth as 2048 KBPS and outgoing should be also same or as provided by ISP.
There is also an option of Define Quality of service for previous protocol. In this you can set how much of total bandwidth you want to give to that particular service or protocol and on which priority. It is shown in percentage. For example : If you want to give total 60% of bandwidth to browsing internet then please select 60% for web. On save the settings the bandwidth settings will be saved and we have to restart the server . As soon as the server will come up ,we can further proceed to make bandwidth pools. That will be assigned to the groups.
Troubleshooting guide in case internet not working ?
Basic troubleshooting in case the internet is not working ?
Do you know the IP address of nebero server?
If yes, then it will be helpful in resolving the issue quite easily
For example if the IP address of nebero is 192.168.1.254
Few Steps are mentioned below that has to be taken
Few things that should be checked on Client Machine:-
Check whether your machine has obtained IP address ?
To find your computer's IP address :
Open Network Connections by clicking on Start button , and then click on Control Panel.
In the search box, type adapter and then, under Network and Sharing Center, click View network connections.
Select an active network connection(LAN or WAN) which you want to diagnose and then, in the toolbar, click View status of this connection.
Click Details
Your computer's IP address appears in the Value column, next to IPv4 Address.
Or You can Use alternate method
In order to check the ip address of machine .Press window key + R key simultaneously .A pop up will appear like this
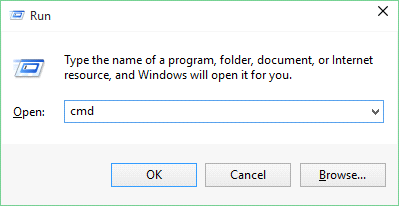
Then, type cmd or cmd.exe and press Enter or click/tap OK.
This will again you show a black srceen.
Note : These all command to be executed in CMD.
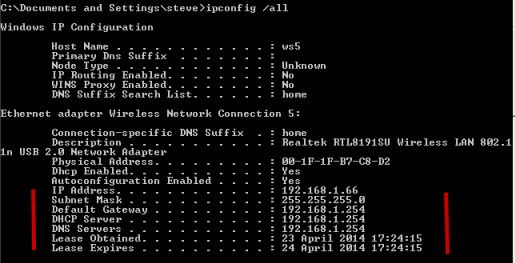
Now type ipconfig /all it will show you all the details
In gateway and DNS server IP address must be of nebero .Like if you have address 192.168.1.254
then it must be in gateway and DNS.
After checking the ip address details. Try to ping your gateway that can be done easily.
TO ping your IP Just type ping
For Example Ping 192.168.1.254
It will output
        64 bytes from 192.168.1.254: icmp_seq=1 ttl=64 time=0.029 ms
        64 bytes from 192.168.1.254: icmp_seq=2 ttl=64 time=0.040 ms
        64 bytes from 192.168.1.254: icmp_seq=3 ttl=64 time=0.040 ms
        64 bytes from 192.168.1.254: icmp_seq=4 ttl=64 time=0.038 ms
If you get such output the your connected to nebero machine.
If you are not getting such kind of reply on your screen then their may be issue with your local lan connectivity.
        Check whether machine is connected to LAN?
        Server is connected to LAN?
        Server is working fine?
Next step to check internet connectivity
Try to ping google.com .If you are able to ping google.com then you will get such kind of reply.
        PING google.com (216.58.220.14) 56(84) bytes of data.
        64 bytes from bom05s05-in-f14.1e100.net (216.58.220.14): icmp_seq=1 ttl=58 time=297 ms
        64 bytes from bom05s05-in-f14.1e100.net (216.58.220.14): icmp_seq=2 ttl=58 time=36.5 ms
        64 bytes from bom05s05-in-f14.1e100.net (216.58.220.14): icmp_seq=3 ttl=58 time=52.5 ms
        64 bytes from bom05s05-in-f14.1e100.net (216.58.220.14): icmp_seq=4 ttl=58 time=36.7 ms
Press Ctrl + C to stop process
        --- google.com ping statistics ---
        4 packets transmitted, 4 received, 0% packet loss, time 3003ms
        rtt min/avg/max/mdev = 36.591/105.798/297.332/110.771 ms
If your are not able to ping google.com or you getting an error Host Unknown.
Then their is some issue with DNS server that is being used by your machine. At this point the issue reported will be of DNS.
Check whether the DNS you are using is correct or not.
Try to ping 8.8.8.8
IF you are receiving the following reply then please correct your DNS Settings.
        ping   8.8.8.8
        PING   8.8.8.8 (8.8.8.8) 56(84) bytes of data.
        64 bytes from 8.8.8.8: icmp_seq=1 ttl=58 time=34.8 ms
        64 bytes from 8.8.8.8: icmp_seq=2 ttl=58 time=34.5 ms
        64 bytes from 8.8.8.8: icmp_seq=3 ttl=58 time=35.5 ms
        64 bytes from 8.8.8.8: icmp_seq=4 ttl=58 time=34.4 ms
        --- 8.8.8.8 ping statistics ---
        4 packets transmitted, 4 received, 0% packet loss, time 3003ms
        rtt min/avg/max/mdev = 34.481/34.884/35.587/0.490 ms
Next Step:-
a. Have you created user ?
If, yes then which type is it system based or web based .
In case of web based the user have to login in web browser.While in case of system based user don't require to login again and again.
b. You will required Adminstrator credential for loggin to admin panel.
For login on your nebero server.
You can login on nebero server using the following link:-
Https://192.168.1.254/nebero
[ Note: Used only for example server IP, it may vary from organizaton to organization ]
Trouble shooting guide for Web based user in Nebero.
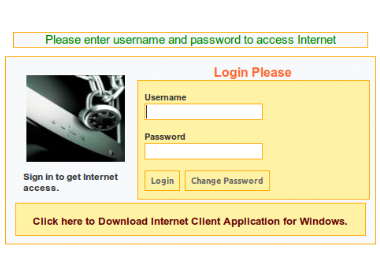
Open the web browser it will open a login Screen is given below that will appear .
Just login with username & password and your internet will start working.
In case login screen does not appearing in the browser. Enter the IP address of Nebero and Hit Enter .
Just log in from username and password and your internet will start working.
Trouble shooting guide for System based user in Nebero.
You can check the user details in Nebero admin panel.
Under
Users>Modify
After you will log in,Check whether you have created the user for that IP address.
Firstly, you need to check whether system base user has been created or not. For that you need to search,the user using the IP address or you can use the name of the user in feild given below.
After you have checked the system based user exists .You need to check whether the MAC address is validated or not that can be done through using the example given below.
Go to
Activity > Users > All
Click on go .All the users that are currnetly online will appear on Screen.
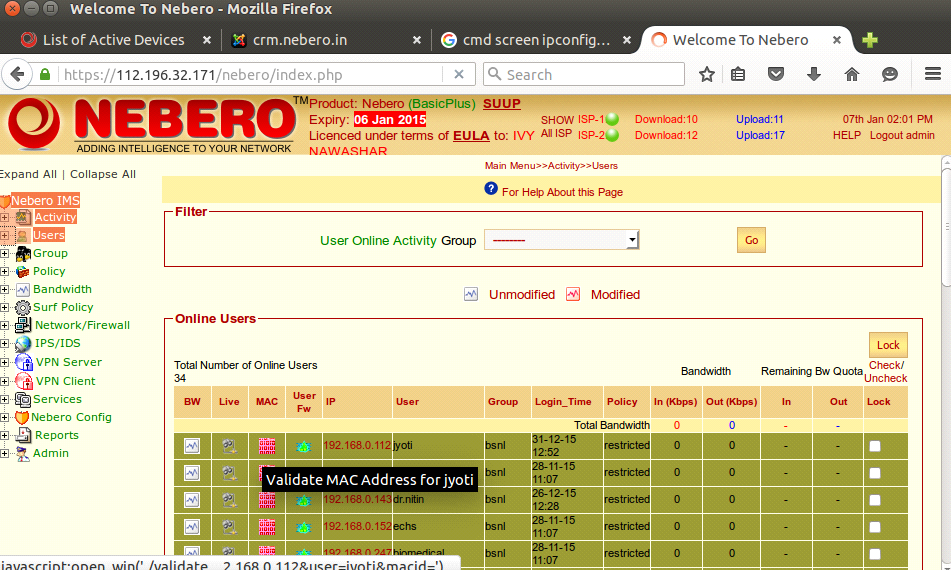
Now, click on the Pink Box appearing in front of you to validate the MAC Address of the user. It will Bind that particular MAC address with that IP.
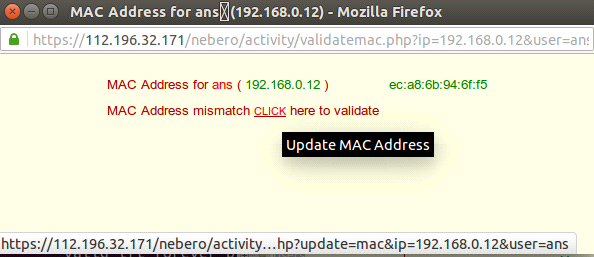
A POP Screen will apper that will Show .MAC Mismatch click on validate, it will validate the MAC address(It means only IP has same MAC address will be able to use the internet.)
After completion of all the Processes. Check, Is your internet is working or not.
If still you have the issue persists check whether any proxy is defined or not on your machine.If yes then set no proxy setting in the Browser.
Setting up PPTP VPN in Window Machine?
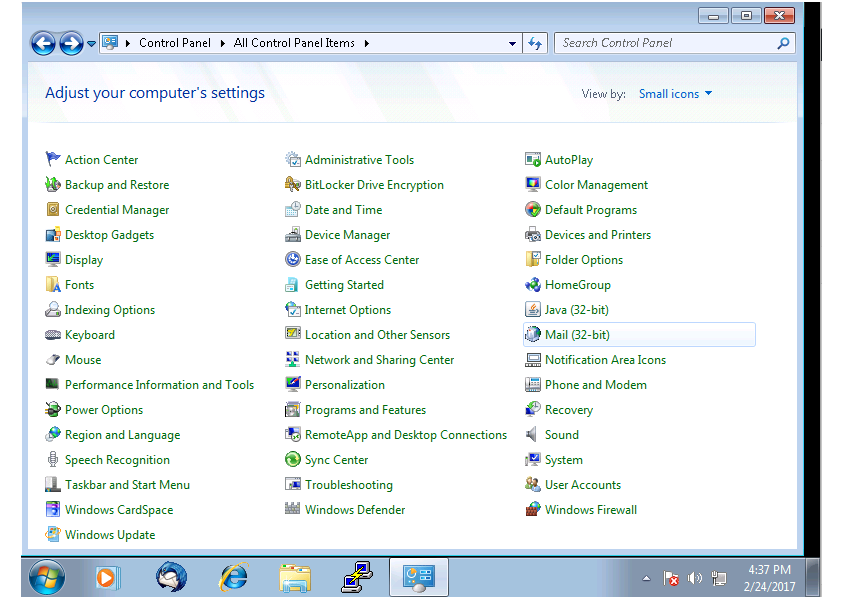
Click on window button.Open the control panel.
1. After opening the control panel look for the option Network and sharing centre and on it,after clickig it will open network and sharing center.
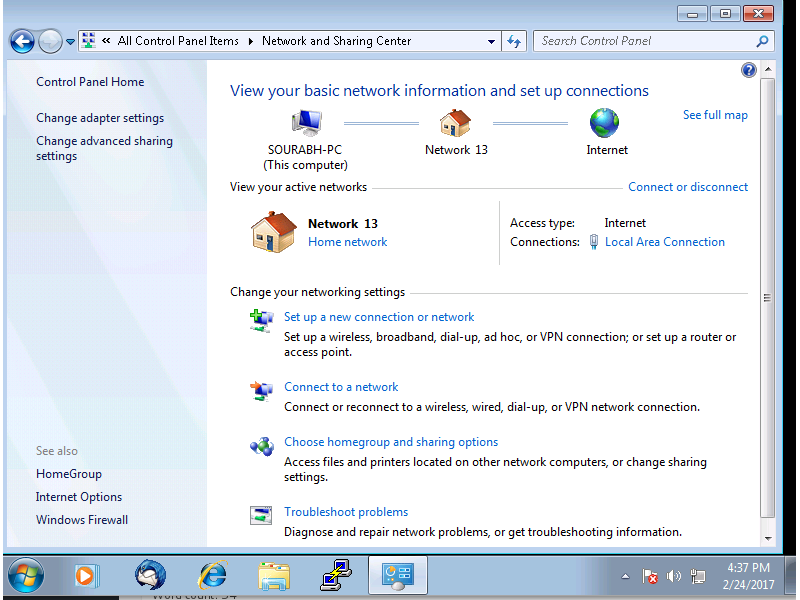
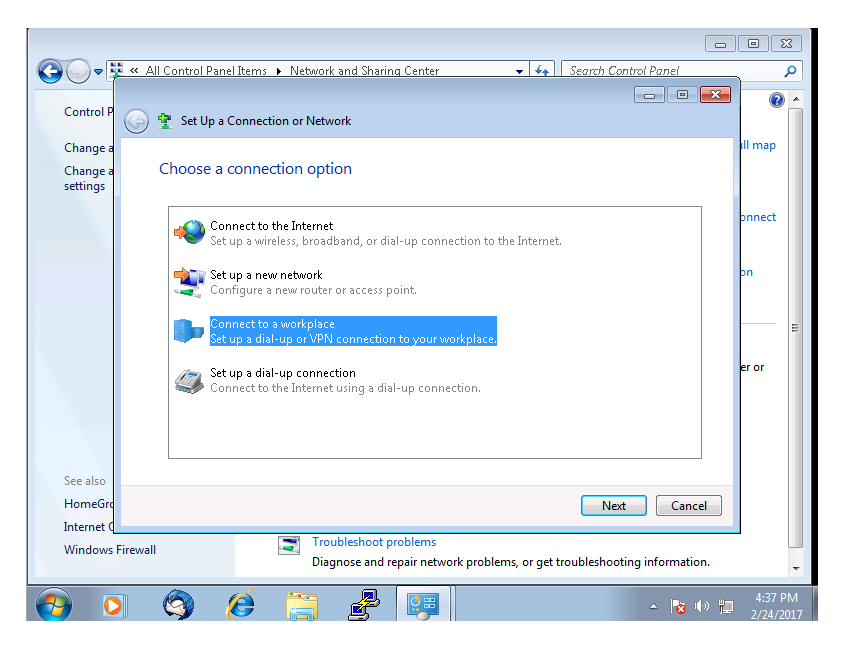
2.Set up a new connection or network.
3. Connect to a Workplace.
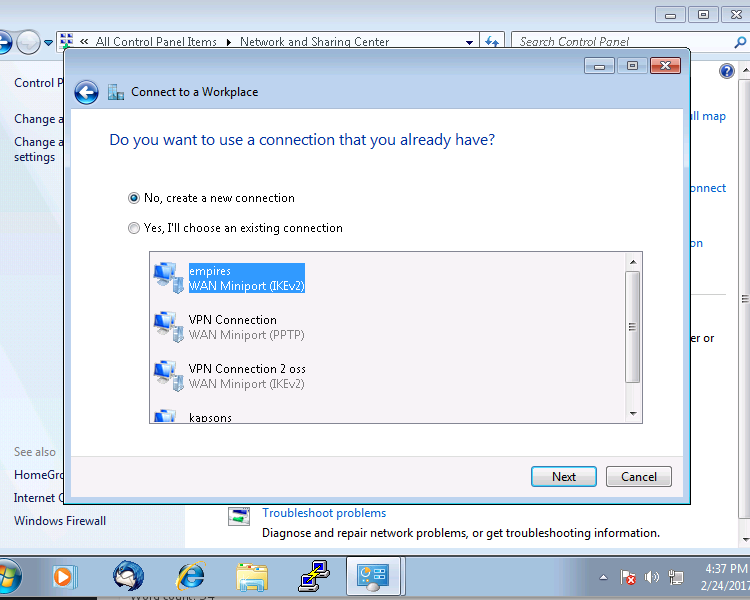
4. Select the option (No create a new connection).Use option same internet connection to dial vpn,Fill the server ip address(i.e address of nebero server) and name of the vpn with which you want to save it on your machine.Click on next button.
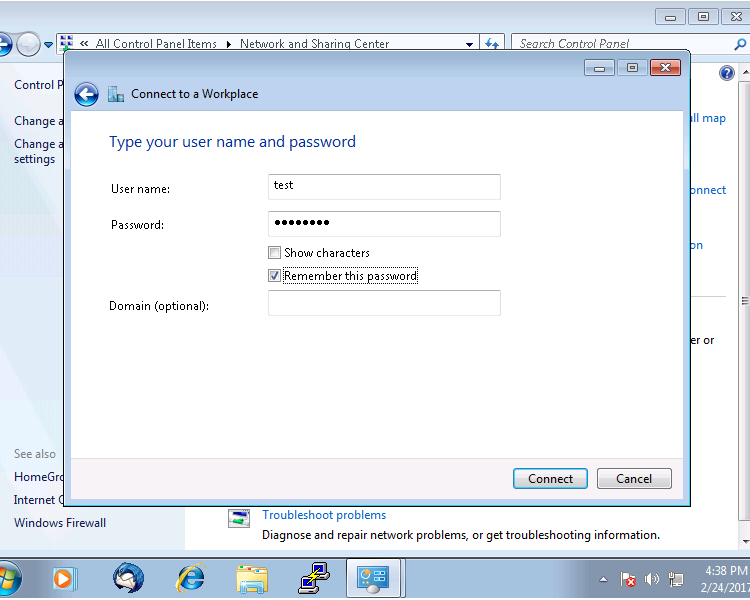
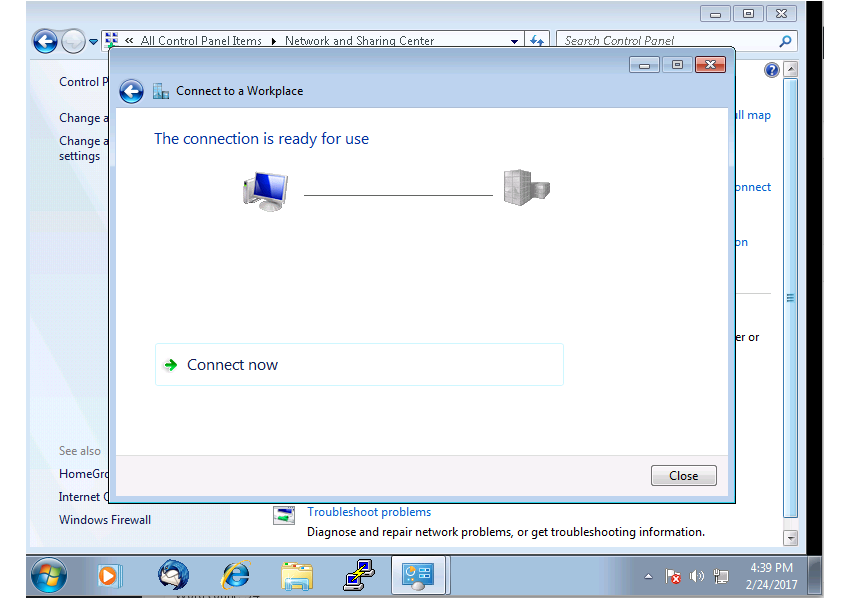
5. It will now ask you for user name and password .Fill the user name and password .No need to fill domain name.Click on next button and save the vpn connection.
Click on the option change adapter setting.
Now right click on the vpn adapter you has created on your Window machine.Go to Networking.Then click on properties.
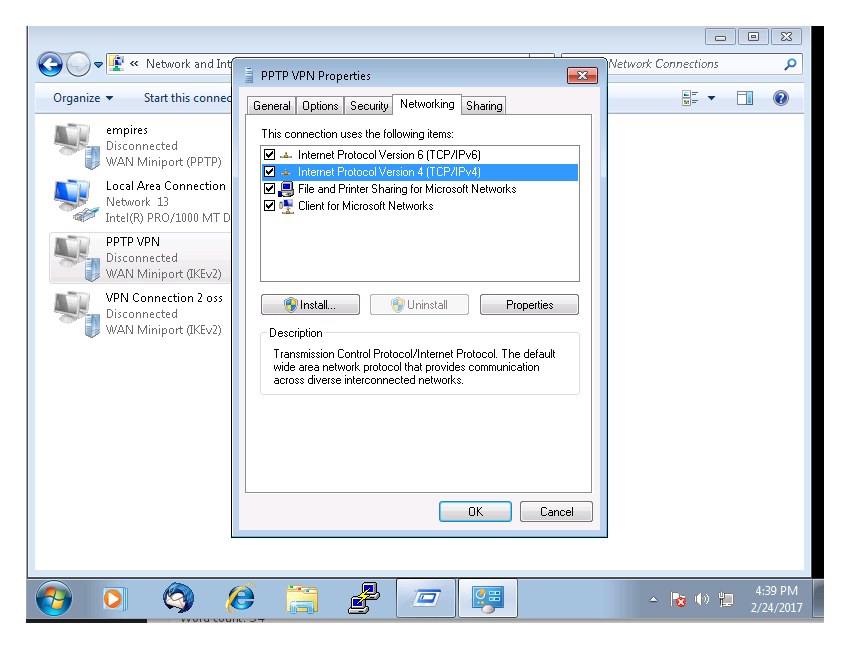
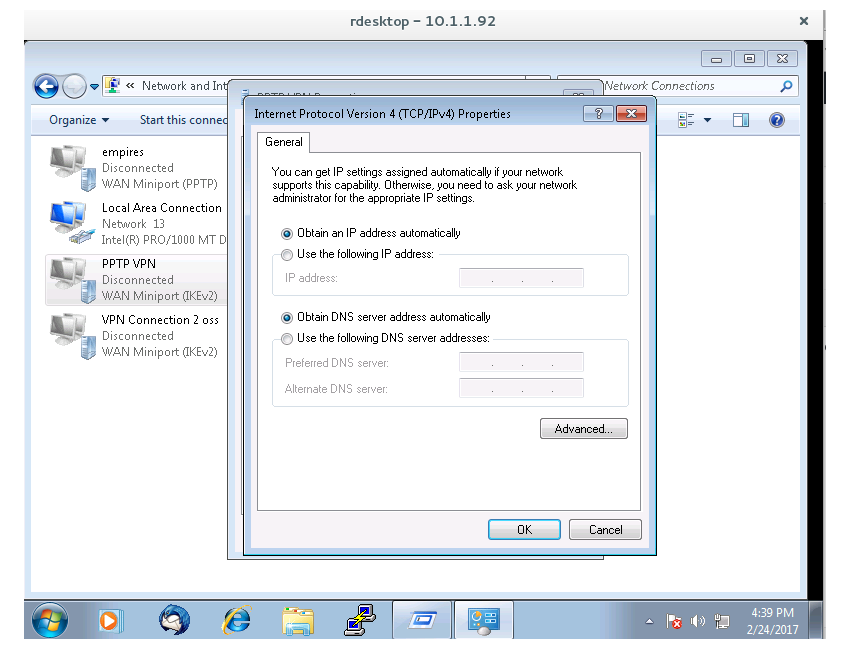
Click on option networking and then select TCP/IP 4 and click on properties.
After which a new tab will appear on screen .Click on advacnced and uncheck the option use default gateway

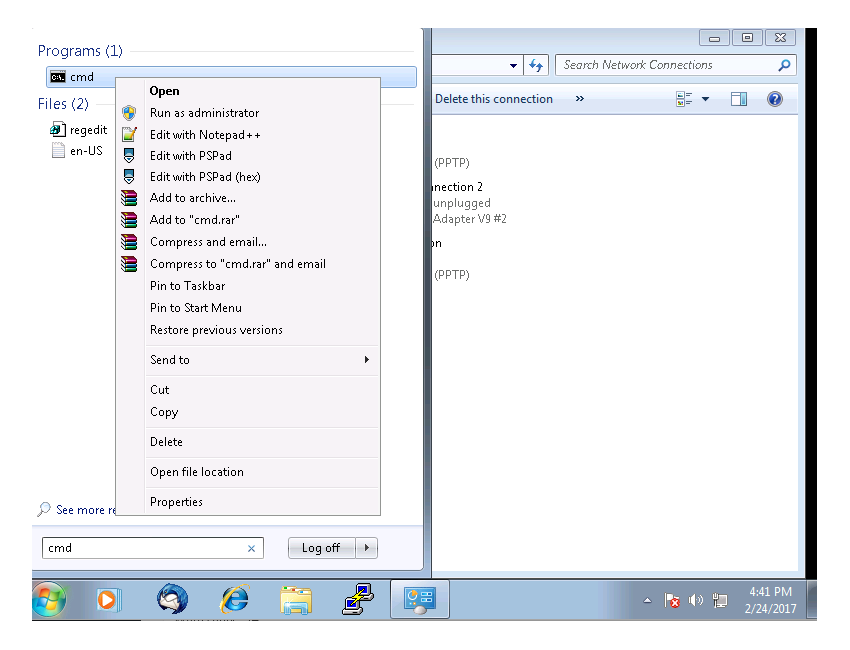
Now click on window button and in search tab .Right click on the cmd and click on option run as administrator.
Right click on the cmd and click on option run as administrator.
Execute the command
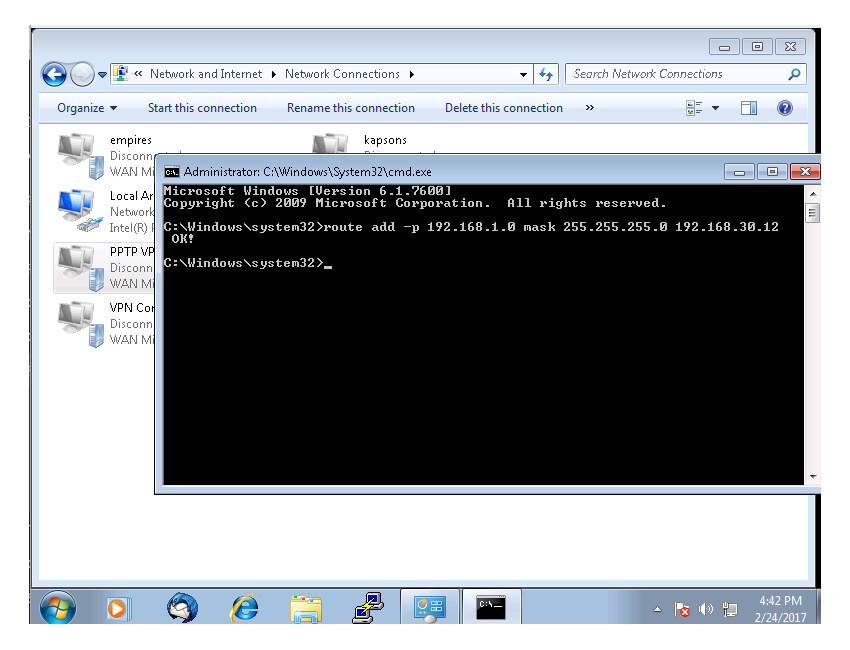
route add -p remote series mask subnet mask ip assinged .
for example if remote server has a local series of 192.168.1.0 and subnet mask of 255.255.255.0 and you have assigned ip address while creating vpn user 192.168.13.12
so you need to execute
route add -p 192.168.1.0 mask 255.255.255.0 192.168.30.12
route print (For verifing route added).
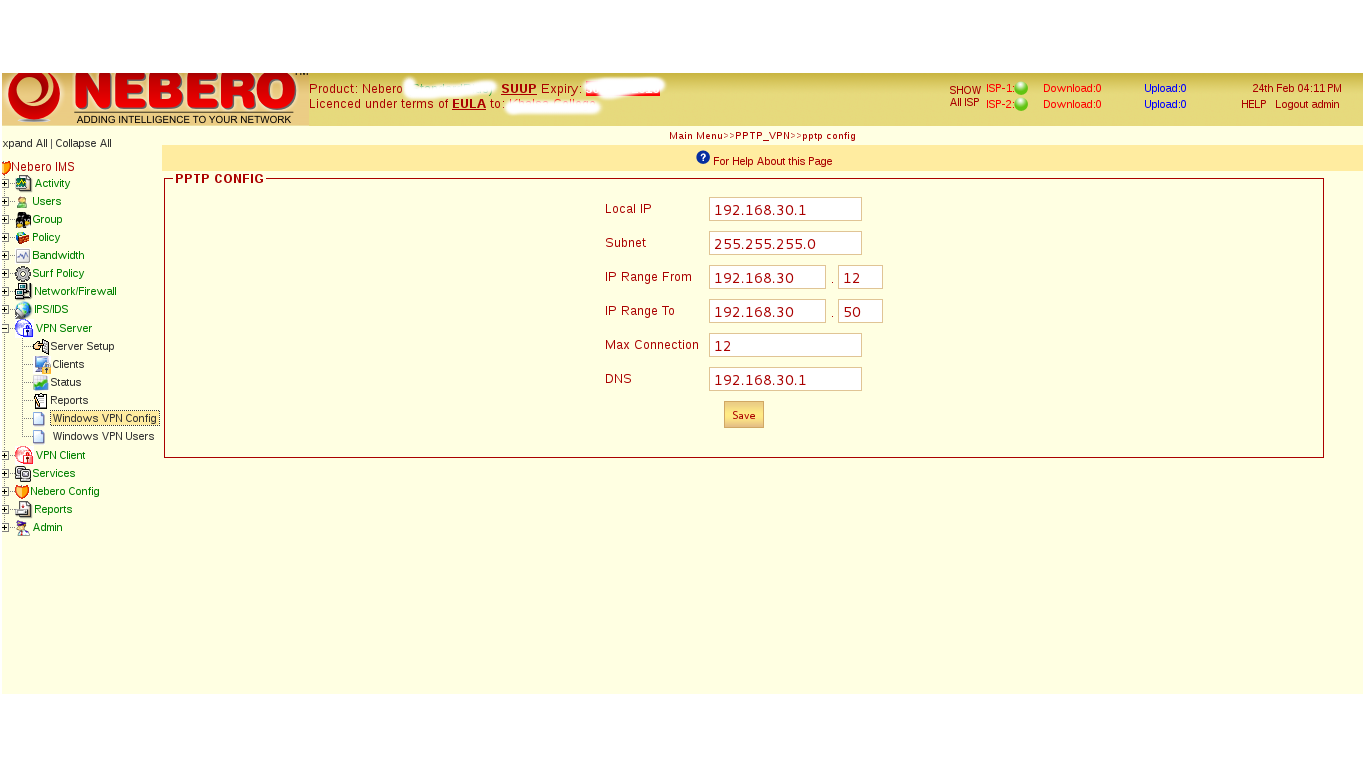
Configuring PPTP VPN ?
You can connect your office network using the pptp vpn using from window,Linux,Mac or android phone.
In order to set up nebero pptp vpn .You need to open your nebero admin panel,After opening nebero admin panel.Look for VPN server option on the left hand side.Click on the option VPN serer and then click on Window VPN config.Here you can define the network,maximum connections,Dns server you wish to use for vpn client.After filling the details you need to click on Save button.Then click on save button
Note:- The VPN configuration setup is for first time only.No need to save it again and again until you feel so.
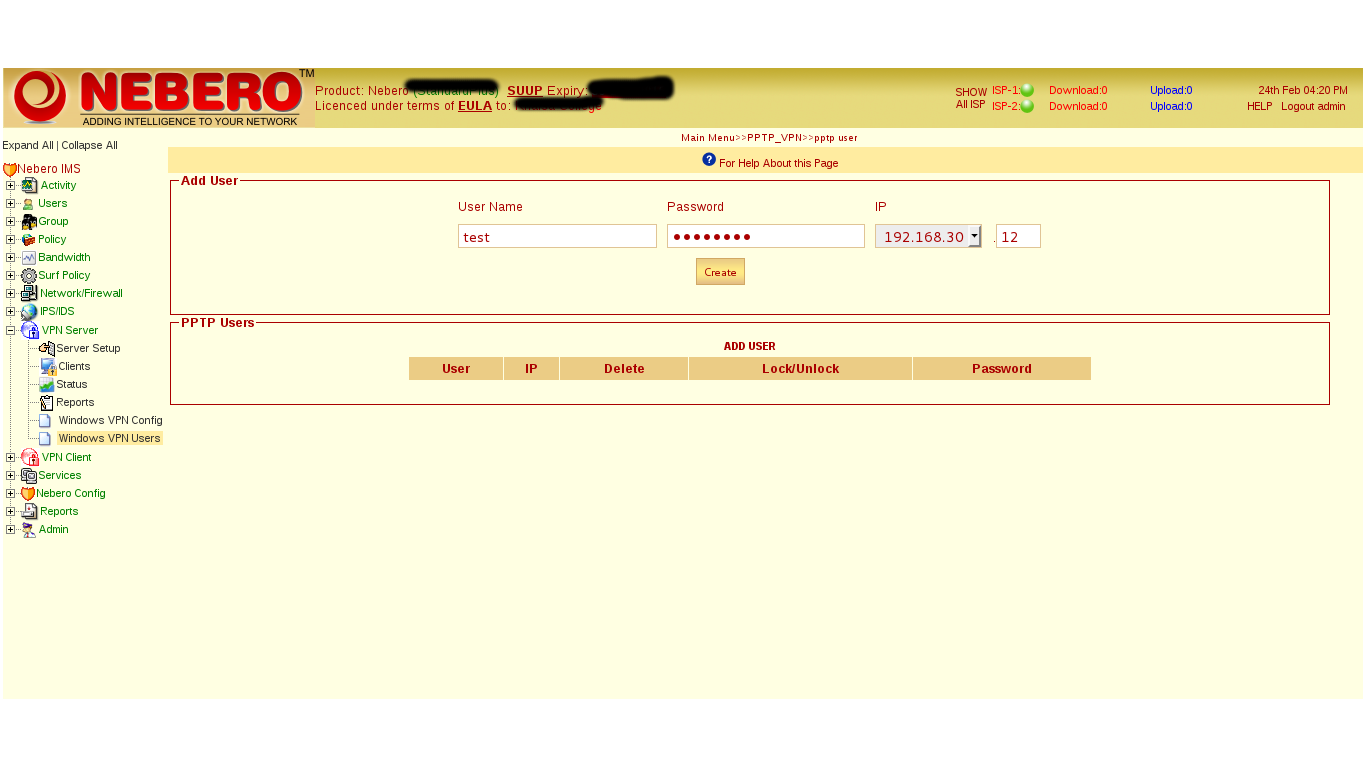
Creating PPTP VPN users.In order to create pptp user you need to click on VPN server.Then window vpn users.Fill the username,password and ip address you want to assign to user.
Changing LAN and WAN IP address ?
In order to change ip address of nebero .You need to login on Nebero Server using the credentials given .
User: nebero
Password: nebero123 (you will not able to see what you are typing.)
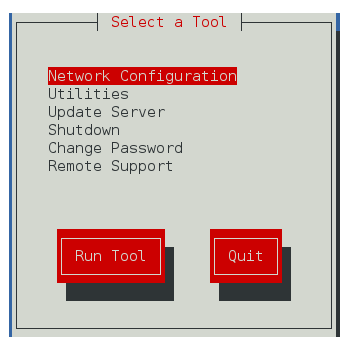
After entering password .Press Enter..You will be promoted to the blue screen given below.
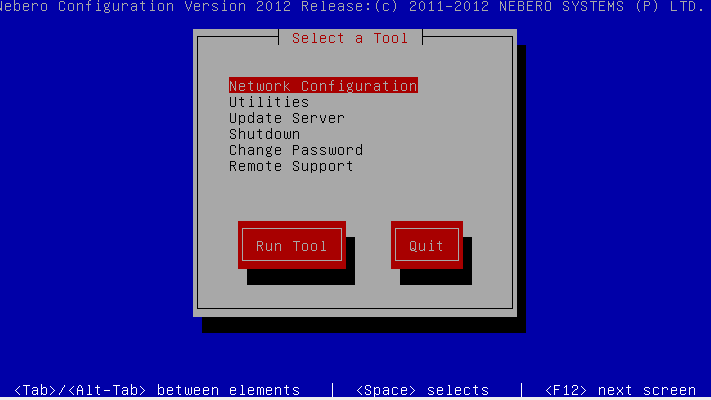
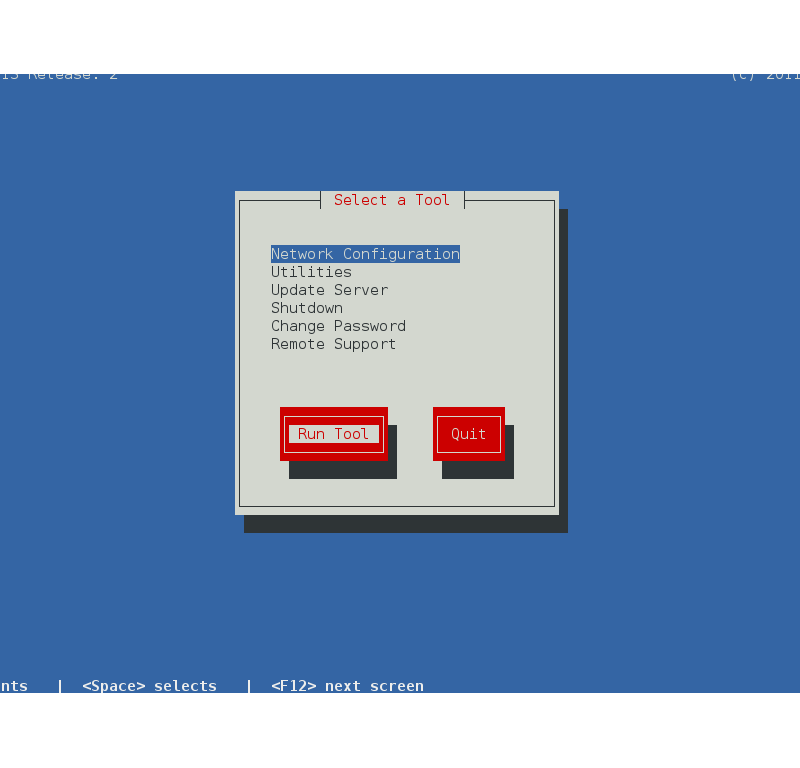
After this Press Tab key and Select Run Tool and Press Enter..
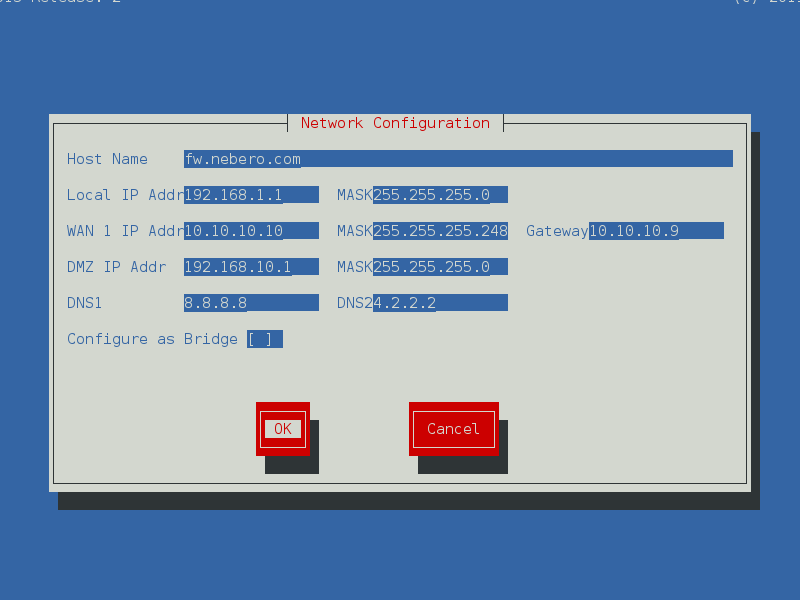
Nebero Setup Utility will flash up with its white border and blue background. Here you will define your network details and will tune Nebero according to your particular network scenario. Here you will need to define:
Note:- You can use Tab Key in order to move
INTERNAL IP ADDRESS: This IP address will be assigned to internal network card, the one which will have internal LAN cable terminated on it. All other PCs in your LAN will access internet through it. So you will have to define this IP address in their network setup as gateway and primary DNS.
EXTERNAL IP ADDRESS: This IP address will be assigned to external network card, the one which will have external cable (cable from your ISPs router) terminated on it. It is your public IP, give to you by your ISP.
GATEWAY: Gateway IP address provided by your ISP.
DNS: Primary and Secondary DNS provided by your ISP.
DMZ: IP address of your DMZ / Perimeter Area Network. If you don't have DMZ / Perimeter Area Network, don't leave this field blank, rather enter a fake IP address which doesn't clash with any of your existing network.
Save and exit from "Network configuration".
How to Configure site to site vpn ?
Setting site to site VPN consist of three major steps.
    1. Setting up the vpn server on Nebero admin panel(Server Side).
    2. Creating vpn client on Nebero admin panel(Server Side).
    3. VPN client configuration on Client panel(Client Side).
In order to create site to site vpn you need to access nebero admin Panel.
After accessing nebero admin panel Click VPN Server Click Server Setup
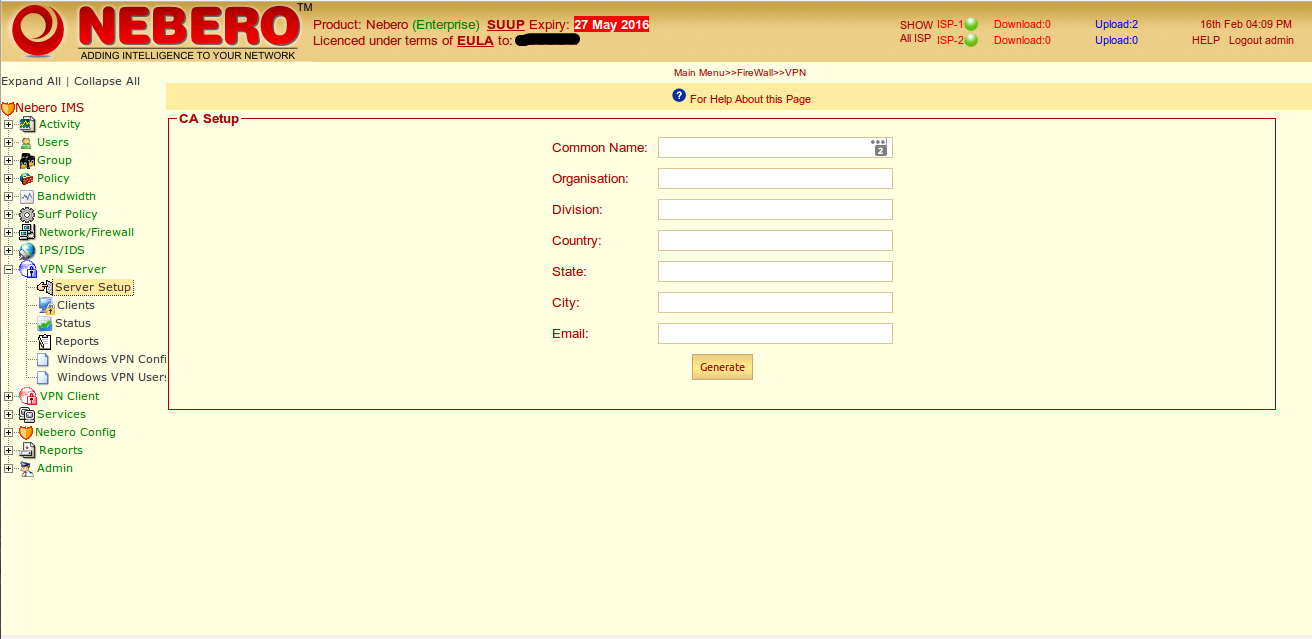
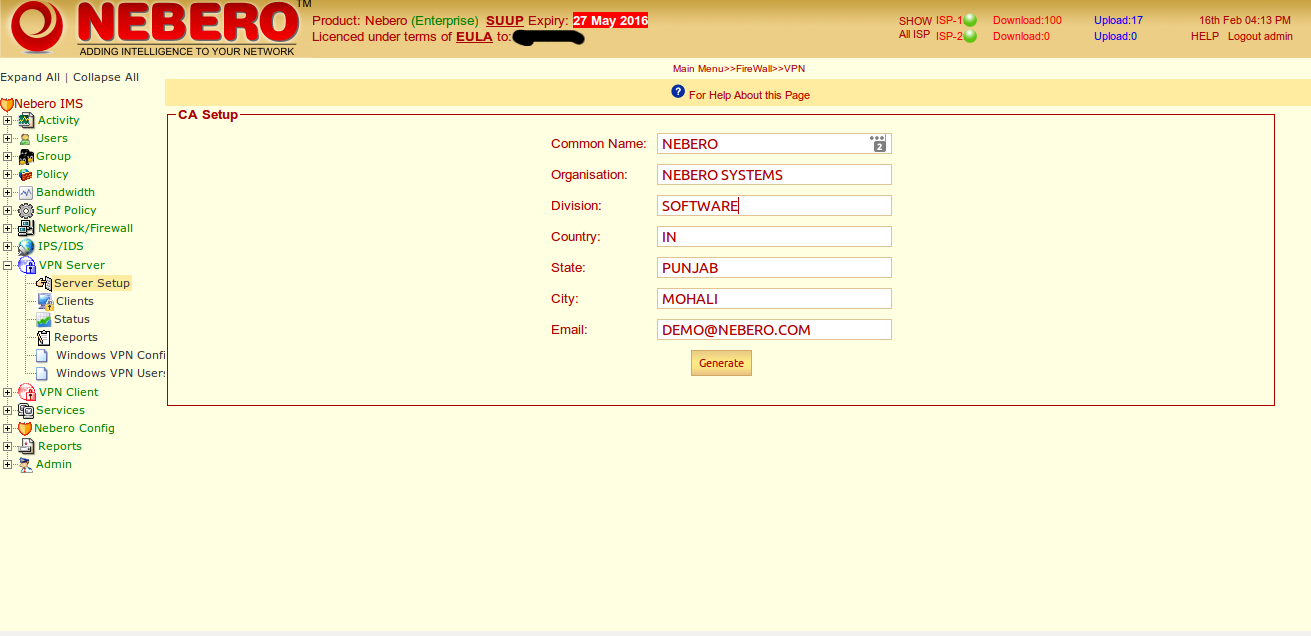
Fill all Information for CA certificate Setup.After all info filled click on Generate button.
After filling the details.Click on Generate button.
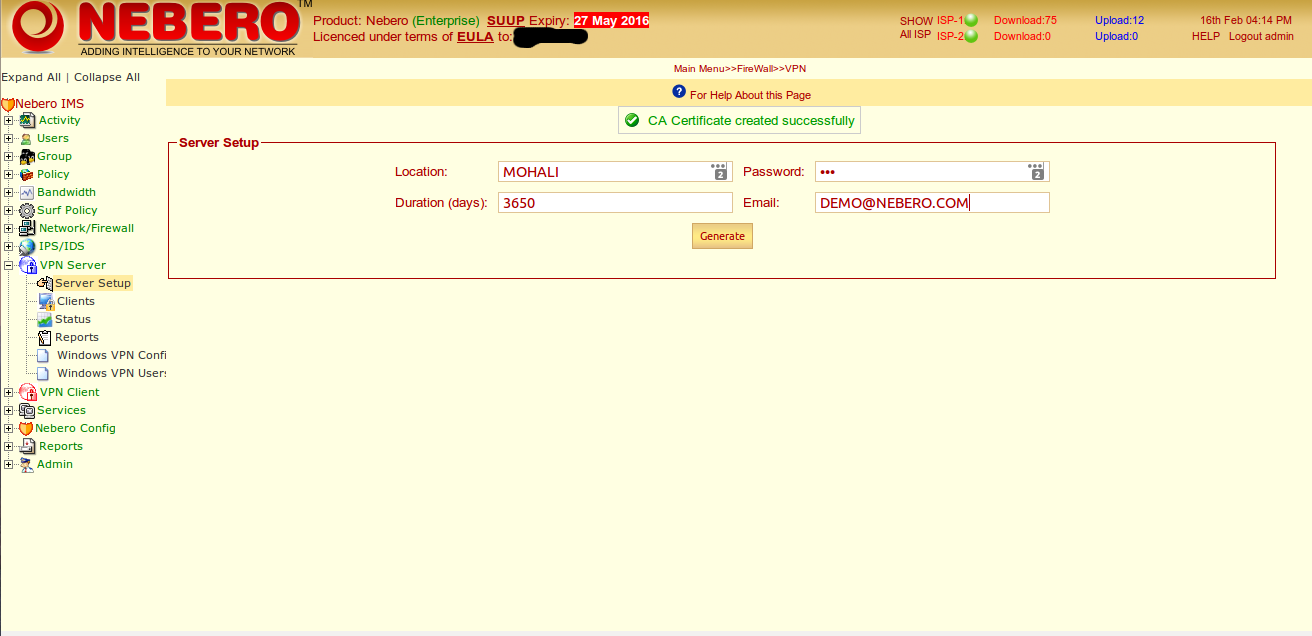
After the sever certificate generated sucessfully.You need to start the services of vpn server by clicking on green Button and it status will be changed from Stopped to Running
Brief description of VPN Server.
1. Click on VPN Server
2. Click Server Setup
3. Fill all Information for CA certificate Setup and click on generate button.
4. Fill server setup info and click on generate button.
5. Restart the service by click on green button and its status will be updated from stopped to running.
Step 2:-
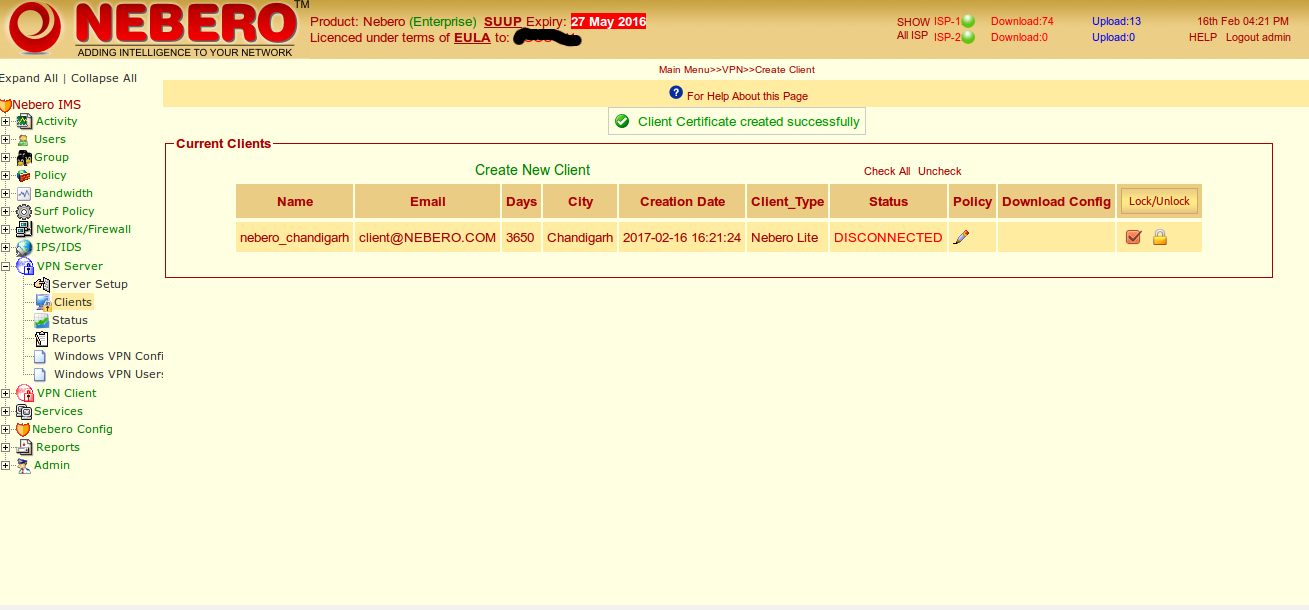
Creating VPN Client
Click on VPN server.Go to the option clients and then create new client.Fill all the detail like shown in the image,also you need to fill the remote ip details in Network behind VPN client.
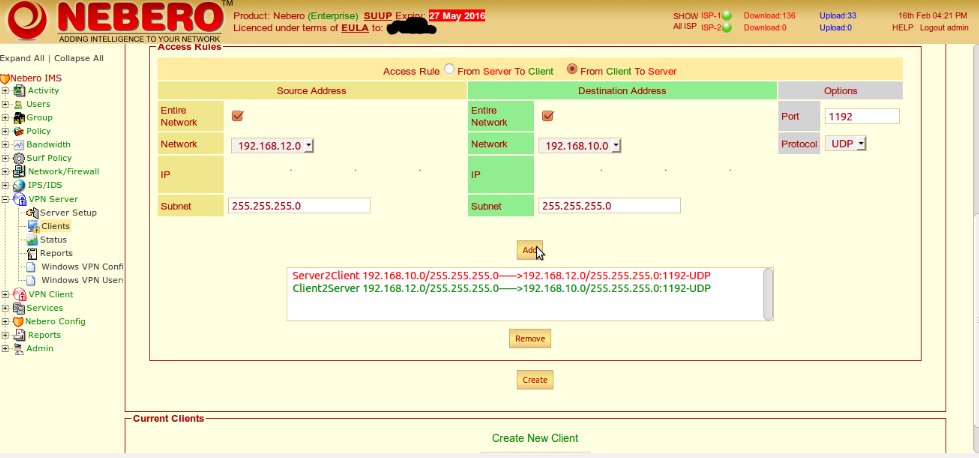
Fill the necessary details like access rule .From Server to Client and Client to serer.You can limit the ip that you want to access or you can choose the entire network.You can define port and protocols and after filling the information click on add button.After filling all the details then click on Create(Button).
Note:- Virtual IP will be assigned automatically.
Now client certificate created sucessfully and by default it's locked you needed to unlock it clicking lock unlock button
Step 3:
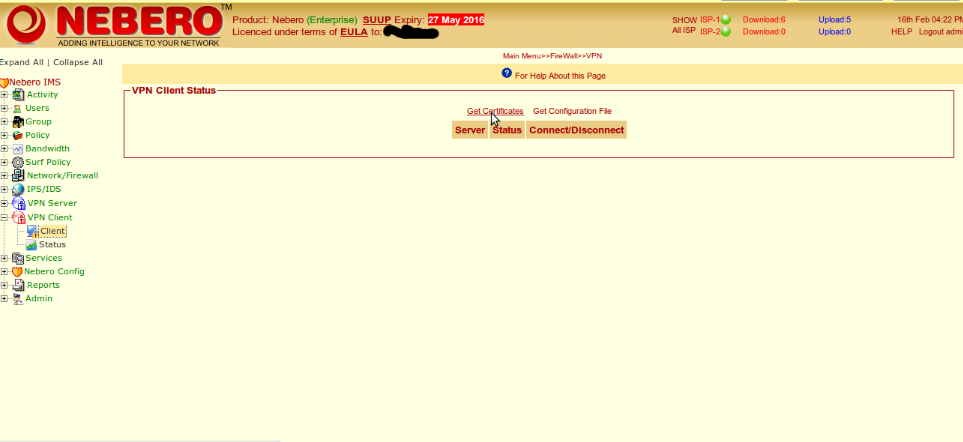
Login to Nebero panel of vpn client.
Click on vpn Client and then click on Client.After clicking on client click on Get certificate button.Fill all the detail's of vpn client as filled when vpn client was created.
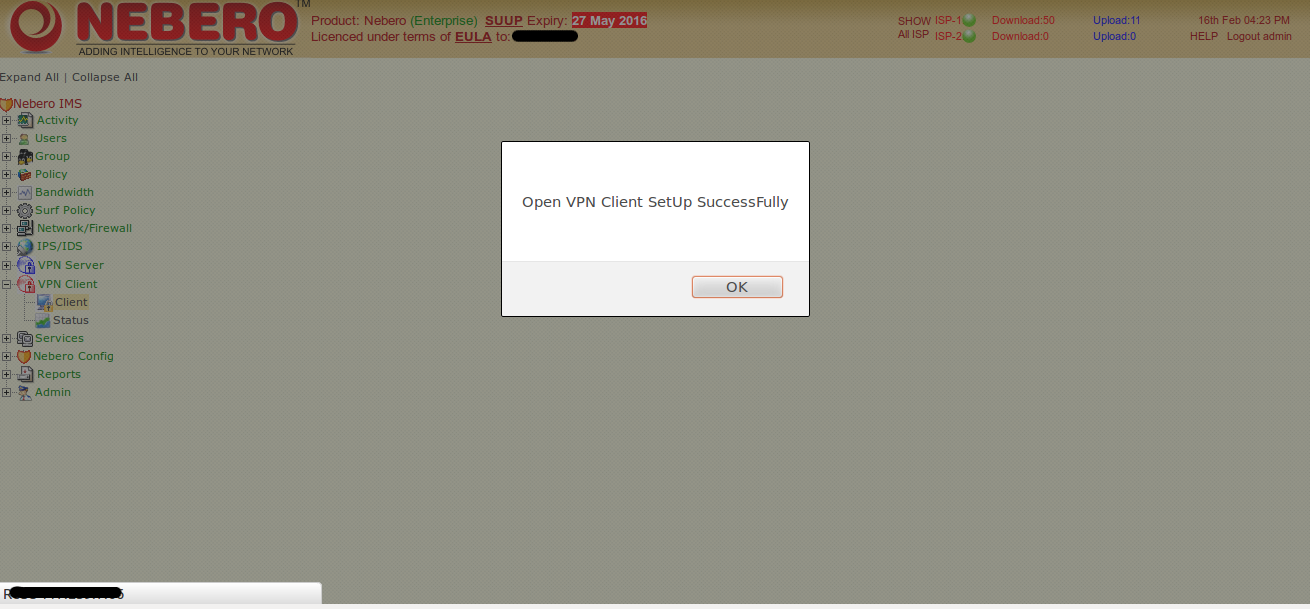
After all Information filled click on Get Now button,you'll get below message Open VPN Client Setup Sucessfully and click on OK button
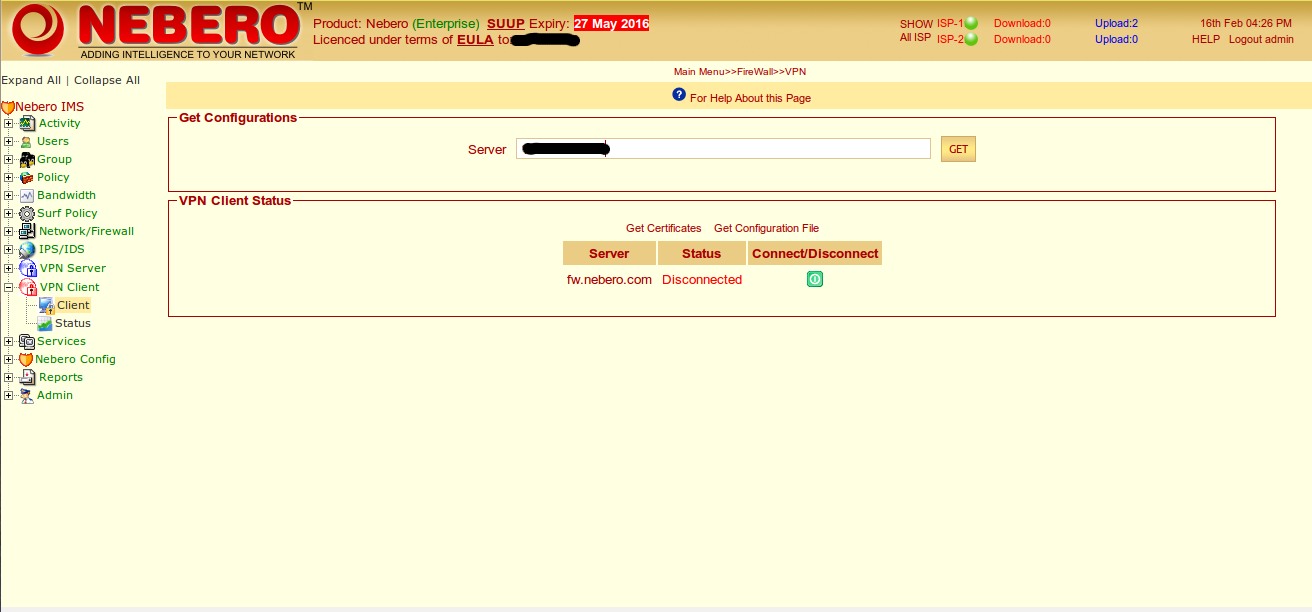
Now click on Get Configuration File below screen appear,Enter here VPN Server IP address and click on Get Button.
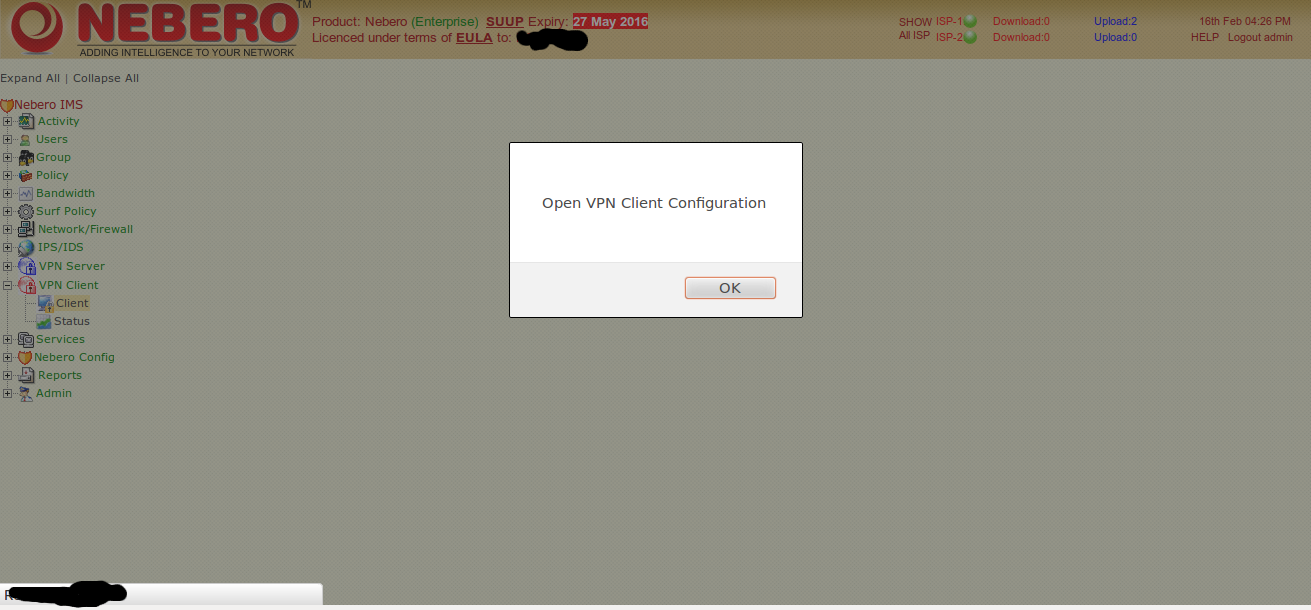
After click on Get Configuration File below screen show message Open VPN Client Configuraiton done sucessfully and click on Ok Button.
Cick on Connect/Disconnect Button to start and stop the service.
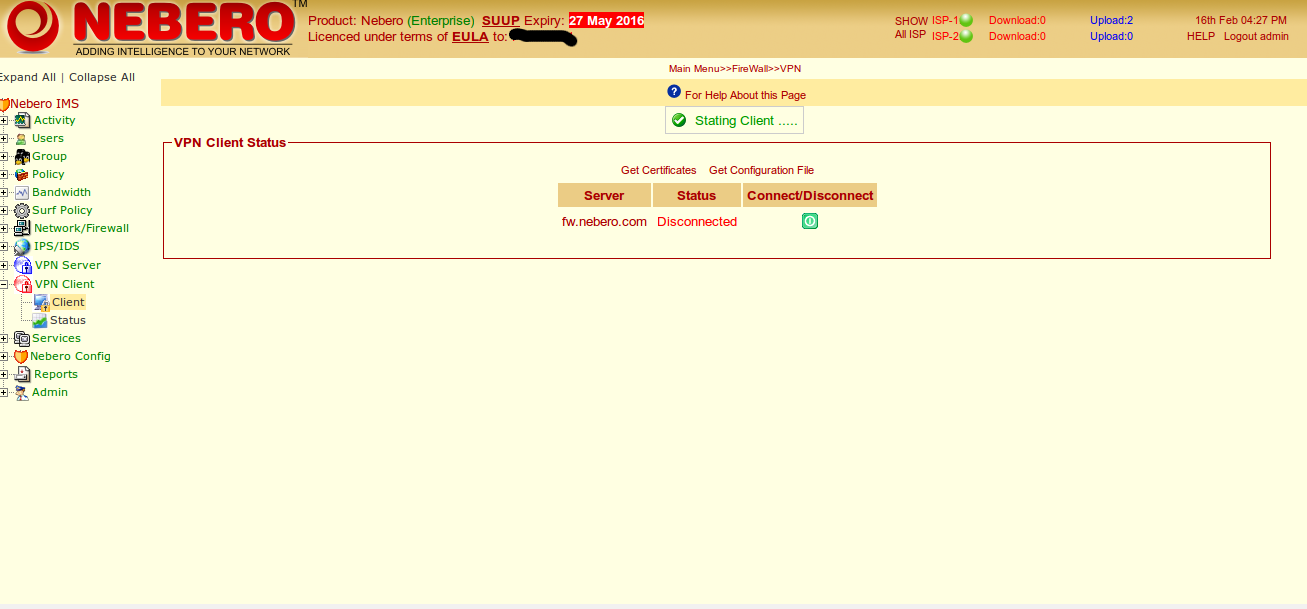
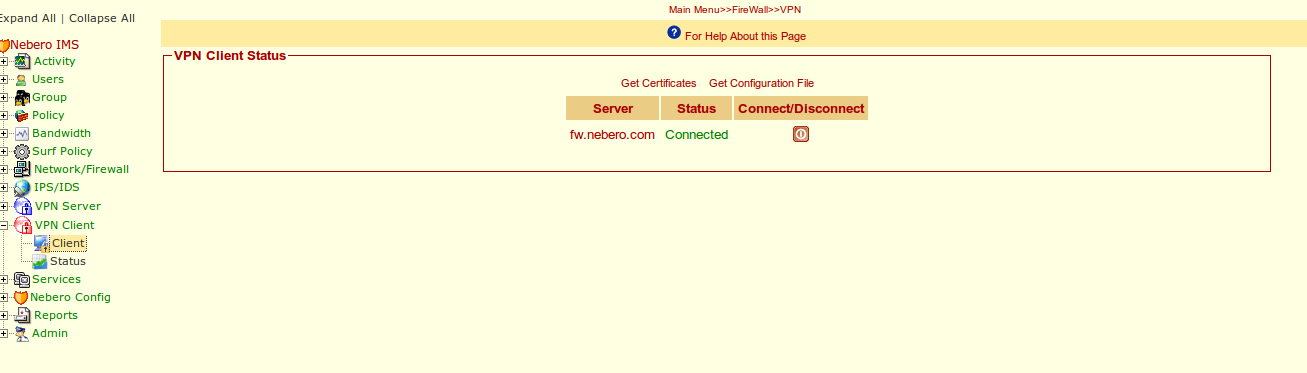
Now click on Client it's showing connected now
Also you can check the status of vpn client in admin panel under option
VPN client > Status
Reset root password in Nebero ?
In order to reset root password .You need to login on Nebero Server using the credentials given .
User: nebero
Password: nebero123 (you will not able to see what you are typing.)
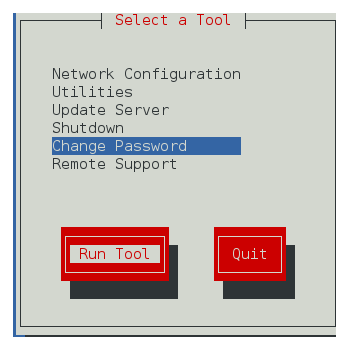
After entering password .Press Enter..You will be promoted to the blue screen given below.
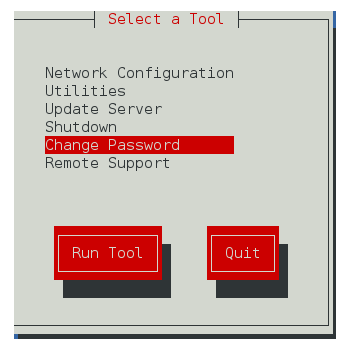
Then Press Down Arrow and select Change password.
After selecting Change Password you need to press Tab button and Select Run Tool.
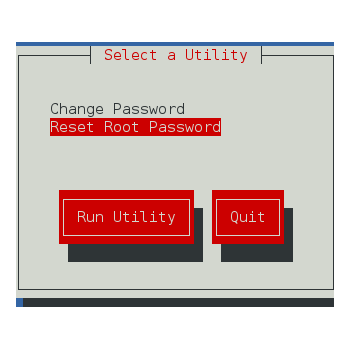
Press Enter .You will be promoted to screen given below.Then press Down arrow and select Reset Root password given below.After selecting reset root password .
Step by Step Guide to install Nebero?
Install Nebero with just 3 keystrokes
This guide will help you to install Nebero on your PC quickly. One of the newest features introduced in this release is automatic installation. The installation process has been simplified and automated to the extent that besides 3 keystrokes no user interaction is required. The only effort needed from the user, during the whole installation process is that he/she just needs to press "Enter" three times. Yes, I know it’s too good to believe, but that is true, with only 3 keystrokes Nebero is up and running on your PC. Even this much user interaction has been left deliberately as a precautionary measure, so that user doesn't end up losing all his data inadvertently, due to auto partitioning.
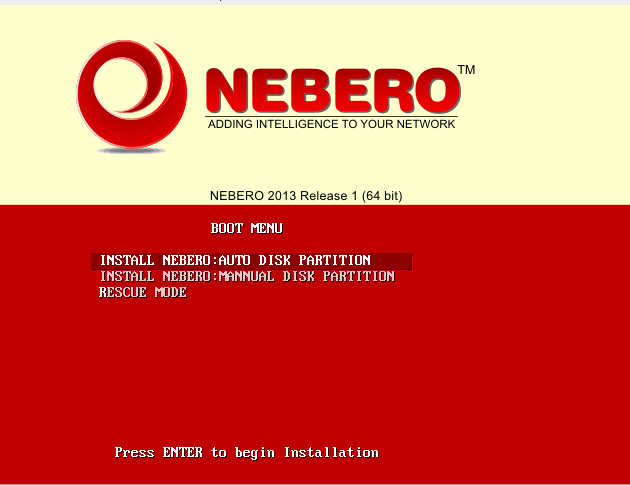
Popin your latest Nebero installation disk in the CDROM/DVD drive of your PC and reboot. Make sure your CDROM/DVD drive is on the top priority in the boot order of your BIOS, otherwise your system won't boot from the CDROM/DVD drive.
If needed, please change the boot order of your system, in BIOS setup and give your CDROM/DVD drive top priority.After rebooting you will be greeted by Nebero boot prompt.Please press "Enter" to boot from Nebero installation disk. You system will now boot from the Nebero installation disk and will perform the actions necessary for installation of Nebero.

Nebero setup will automatically calculate the partitions required for installation and will inform you before actually creating the partitions through a popup window.
It will wait patiently for your confirmation to proceed further. Only when you press "Enter" it will proceed further and will actually start creating the partitions for you. It will create the partitions and format them with required file system. And the installation will proceed further.
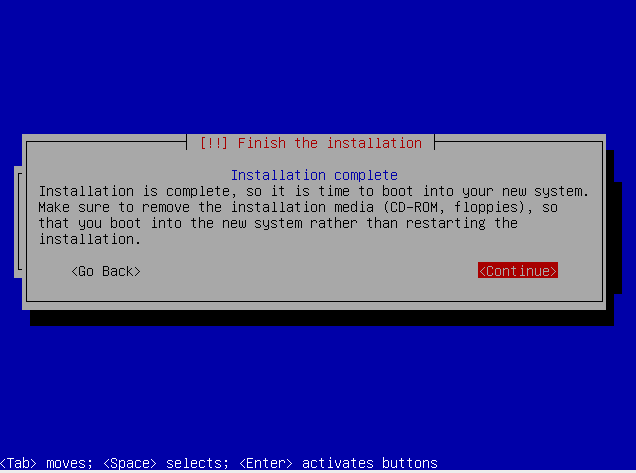
Note:- Pressing Enter will format your Entire disk.
Nebero setup will once again ask you to press "enter" this time the last one, when the installation process will finish. As you press enter, your PC will reboot into your newly installed Nebero